
Aoriqileng vs Cody Haddon
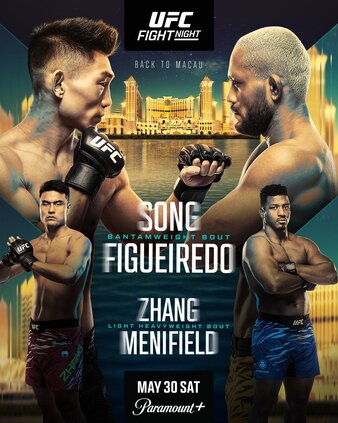
Men's Bantamweight Bout • UFC Fight Night: Song vs. Figueiredo
Saturday, May 30, 2026 • 30-foot Octagon (Large Cage · Galaxy Arena, Macau)
Explore Detailed Fighter Profiles
Click on either the fighter's name or profile image for each fighter to access comprehensive UFC statistics including striking metrics, grappling data, clinch performance, complete fight history, offensive & defensive analytics, and round-by-round breakdowns.

Aoriqileng
Fighter Metrics
Victory Methods
Win Round Distribution

Cody Haddon
Fighter Metrics
Victory Methods
Win Round Distribution
📋 Last 5 Fights - Aoriqileng
| Date | Opponent | Result | Method |
|---|---|---|---|
| 2025-10-18 | Cody Gibson | W | KO/TKO — Punches (R1, 0:21) |
| 2025-06-07 | Raul Rosas Jr. | L | Decision - Unanimous (R3, 5:00) |
| 2024-12-14 | Daniel Marcos | NC | No Contest (R3, 2:28) |
| 2024-06-08 | Johnny Munoz | W | Decision - Unanimous (R3, 5:00) |
| 2024-03-02 | Aiemann Zahabi | L | KO/TKO — Punches (R1, 1:04) |
📋 Last 5 Fights - Cody Haddon
| Date | Opponent | Result | Method |
|---|---|---|---|
| 2024-11-03 | Dan Argueta | W | Decision - Unanimous (R3, 5:00) |
| 2024-06-06 | Billy Brand | W | Submission - Rear-Naked Choke (R1, 3:09) |
| Paul Loga | W | Submission - Rear-Naked Choke (R1, ) | |
| Raja Shippen | W | TKO (R1, 1:00) | |
| Dong Il Kim | W | TKO (R1, 0:56) |
Technical Analysis
Technical Score
Cardio Score
Overall Rating
📊 Technical Score
Calculated as the average of Striking Composite (44 vs 62) and Grappling Composite (40 vs 51) from the MMA Model roll-up — mirroring jsonMappers. Haddon clears the striking composite on volume + defensive strike stats; grappling favors his TDD/sub threat while Aoriqileng keeps clinch-TD viability.
💪 Cardio Score
Based on average fight duration, striking rate per minute, takedown rate, and finish rate. Measures cardiovascular endurance and ability to maintain pace throughout fights.
🎯 Overall Rating
Simple average of Technical Score and Cardio Score. Provides a holistic view of fighter capabilities combining skill level with physical conditioning and fight performance.
Striking Composite
Grappling Composite
Technical Radar Comparison
Visual comparison of key performance metrics between both fighters
📊 Detailed Statistical Comparison
🥊 Fight Analysis Breakdown
🧩 Aoriqileng Key Advantages
The Mongolian Murderer arrives off a Cody Gibson knockout in twenty-one seconds—the entire handicap lives in whether that version clocks in again versus a volume engine. Tape and round logs show polarity: Zahabi iced him 1:04 on near-even significant strikes (5–5), underscoring that clean counter timing nukes reckless entries. Career data still prices him mostly as a minute-bank decision winner, but UFC-level variance on this axis is unmistakable.
Distance accuracy in computed metrics favors Aoriqileng (54.5%) over Haddon (48.4%) even though 4.65 SLpM cannot match a 9.20 operator — the classic counter-striker silhouette. Twelve percent of career significant strikes targeted the legs versus only 4% for Haddon — a tangible way to blunt entries and shorten combination chains without winning a pure strike-count fight.
Aoriqileng is not helpless when lanes compress: modeled clinch-takedown economics cite 14/30 successes (46.7%) — better completion on more tries than Haddon (37.5% on sixteen charted bids). Sprinkle-level wrestling can steal minutes in the big cage against a fighter who thrives on resetting into space—but panic shots into 83% TDD gift sprawls, entries must be purposeful.
⚠️ Unfavorable Scenarios
Extended standing sequences in thirty feet amplify Haddon’s 9.2 SLpM versus 5.46 SApM — a historically negative strike ledger (−0.81 per minute versus Haddon's modeled positive spread). Against Rosas the round log collapsed to essentially one landed sig strike in Round 3 (1-of-2) — when he cannot grapple or hurt, pace cliffs appear on the UFC tape.
25% of documented pro losses came via submission versus only 8% by KO — a meaningful hazard profile against DWCS-tested neck attacks and guillotine-tagged scouting data. Exhausted clinch dives or sloppy level changes expose him to 0.83 submissions per fifteen for Haddon even when attempts do not populate every outing.
📋 Likely Gameplan
Phase-one discipline: calf and outside leg work, feints, and refusal to sit in fifteen-punch Haddon combos. Leverage modeled slow-start → strong-finisher arcs (215% R3 jump in proxy strikes) — trust the ramp without gifting early optics.
Exit strikes in two- and three-shot bursts as Haddon leaves combination lanes — his scouting layer shows mirrored 0.67 jab-and-counter pacing. When behind on totals, disguise entries after striking feints — snap doubles and body locks timed with remaining fuel—not desperate shots begging for sprawl cycles.
🚀 Cody Haddon Key Advantages
Nearly double the official SLpM line (9.20 vs 4.65) with elite defense (64%), lower absorption (3.47 vs 5.46), and computed damage ratio 3.09 versus 2.09 — the statistical blueprint for winning optics standing. Bantamweight snapshot ranks spike him toward the top in volume absorbed defense and efficiency — exactly what thrives when the cage is thirty feet wide and resets abound.
Haddon defends shots at 83%, mixes 2.48 takedowns per fifteen himself, and keeps a credible front-neck / rear-naked threat aligned with scouting tags. The Argueta debut logged escalating output (45 → 31 → 64 significant strikes landed by round — dedup-aware) proving fifteen-minute pacing, while modeled R1→R3 pace still climbs (~142%) alongside jab / counter layers at ~0.67 normalized rates — not a reckless linear bulldozer despite high tempo.
⚠️ Unfavorable Scenarios
The Gibson blueprint is ruthless: negligible strike totals, fight over. Early sequences where Aoriqileng slips power through disguised entrances remain the swing factor—especially in Round 1 when slow-start tagging still matters psychologically despite “strong finisher” modeling overlays.
Twelve-percent leg targeting for Aoriqileng doubles as pacing disruption if Haddon ignores checks and stance maintenance. Accuracy versus Argueta began at roughly 47% Round 1 while volume ramped upward — sloppy wide hooks into veteran counters swing swing-round optics even inside winning macro trends.
📋 Likely Gameplan
Anchor rounds behind layered jabs (~0.67 reference rate per metrics row) paired with calves-to-body touches that climb late — computed Round 3 targeting tilts torso share toward ~28% body kicks while sustaining Haddon pace tiers. Maintain 64% defensive shell discipline — do not gift naked power lanes for the Mongolian Murderer handshake.
Use clinch conversions (88.9% accuracy caveat: small-sample but loud) alongside knees whenever Aoriqileng crashes without setup. Sprinkle takedowns to bank control ( Argueta log: ~2/4 completions, segmented control flashes) rather than handing desperation counters — close the fight with escalating volume as per the UFC debut fingerprint.
🎯 Fight Prediction Analysis
Data-driven prediction model based on statistical analysis
📊Detailed Analysis Summary
🏟️Cage Dynamics
The thirty-foot oval in Macau is not trivial geometry—it lengthens resets for the higher-output athlete and lengthens laterals for the man trying to bleed clock without gifting entries. Listed height and reach are identical, so the cage becomes a pacing question: Can Haddon jab-layer and cut space before Aoriqileng finds the counter-hook channel that buried Gibson? Conversely, whenever Aoriqileng clamps clinch snaps with intent, cage space compresses and Haddon loses the glide-out rhythm that powers his strike economy blueprint.
🎯Technical Breakdown
Two battlegrounds dominate the tape: cumulative strike optics ( Haddon carries ~9.2 SLpM versus 4.65 for Aoriqileng) and grapple contingencies (83% TD defence plus 0.83 submission pressure versus sprinkled clinch takedowns on higher attempt totals for China's veteran). Distance accuracy modeled at 54.5% for Aoriqileng versus 48.4% keeps him honest shot-for-shot — aggregate absorption (5.46 SApM) and negative net striking still describe the unfavorable baseline when Haddon makes the sprint a marathon.
🧩Key Battle Areas
Critical levers cascade from respect for negative strike economy, disciplined early shot selection for Haddon, cage-cutting IQ to deny clean resets, purposeful wrestling intent from Aoriqileng, and Macau judging ambiguity if damage concentrates in one round while totals spread elsewhere (tilt stated but noted). Spatial shares from the MMA Model stack ( Haddon's 92.9% distance offense vs modest ground bleed for Aoriqileng) reinforce kickboxing posture until someone drags grappling entropy into clean sequences.
🏁Final Prediction
Model anchors on Haddon edging two-of-three statistical mirrors through volume plus layered defence/grappling (≈61% aggregate win share) while reserving nearly four-in-ten simulations for Mongolian Murderer volatility— clean counter sequences, purposeful clinch interruptions, leg attrition ladders, or opportunistic fight-ending shots like the Gibson data point (0:21). Submission equity remains live for the Australian if desperation wrestling opens neck exposure; knockout equity remains live for China's vet through binary early chaos.
💰 Betting Analysis: Model vs Market
Detailed value assessment in the betting market
📊Market Odds
🤖Analytical Model
💎Value Opportunities
MAXIMUM VALUE
Model: 32% path | Fair-ish American ≈ +113 on Goes Distance (Yes bucket)
GOOD VALUE
Model: 18% inside-distance KO lane | Gibson template — fair ≈ +456 before vig
SLIGHT VALUE
Consolidated judge paths ≈ 47% versus inside-distance mass ( KO/TKO + Sub)
⚠️Key Market Discrepancies
- • May misprice one-exchange upside – Books can fade veteran power after the Gibson KO without baking full tail risk.
- • UFC-sample depth on Haddon – Argueta n=1 is bankable pacing but extrapolation risk remains.
- • Big-cage kickboxing gravity – Space rewards volume-first profiles unless cage craft collapses resets.
🎯 Comprehensive Probabilistic Analysis
100 hypothetical fight simulation based on statistical data
🏆Outcome Distribution - Aoriqileng
Grinds close frames / swing-round steals on damage
Counter windows & power spikes mirroring Gibson
Opportunistic if Haddon gets loose on neck pursuits
💥Outcome Distribution - Cody Haddon
Regional/DWCS violence backed by knockout priors on tape
Primary macro route — optics + grappling hedge in three rounds
Front-neck / rear-naked tax if desperation shots appear
⏰Fight Timeline Analysis
⚡Window of Opportunity - Aoriqileng
- • Round 1 hazard: Hunt Haddon exiting exchanges — modeled counter overlaps with his combination habits.
- • Leverage calves/body layers: Slow down feet before power trades escalate.
- • Dodge charity clinches: His clinch-accuracy outliers punish reckless crash-ins.
🎯Progressive Dominance - Cody Haddon
- • Minute banking: Stack jab/feint layers with rising volume arcs like the Argueta closeout.
- • Economy guardrails: Hold defensive strike shell near the sixty-four percent career quote.
- • Break-glass grapple: Mix clinch knees and opportunistic shots if legs dip — punish panic wrestling.
🎯 Final Confidence Assessment
Confidence level and uncertainty factors
Confidence Level
Strong statistical edge for Haddon, tempered by UFC n=1 + power chaos
✅Supporting Factors
- • Massive cumulative strike optics (9.2 vs 4.65 SLpM) with lower absorption
- • Defensive wrestling ceiling (83%) plus submission equities
- • Damage-ratio & BW rank clusters align with Macau distance fight
- • Fifteen-minute UFC pacing proof + rising R3 output trend
⚠️Risk Factors
- • Single-fight UFC sample may regress versus tailored gameplans
- • Binary early knockout equity after Gibson-esque sequences
- • Veteran counter timing + purposeful clinch takedowns erasing resets
🏁Executive Summary
If Cody Haddon delivers the disciplined jab-and-volume scaffolding from the Argueta dataset—while resisting the lure of reckless exchanges—projection leans toward him out-touching Aoriqileng across two-of-three statistical mirrors in the spacious Galaxy Arena cage, reinforcing model ranks on differential damage and defensive strike metrics. Conversely, Aoriqileng's Mongolian Murderer lane almost always screams single-sequence punctuation: the Gibson knockout is not an abstract talking point—it is leverage that bends priors overnight. Grappling subplot matters less as a wrestling marathon than as choke insurance layered onto a kickboxing core: Haddon defends historically, yet Aoriqileng loses to submissions far more often than to knockouts across the sampled loss column—keep eyes on desperation shots that expose necks.
Prediction: Haddon's widest avenue runs through judge-friendly decisions (≈ 32%) plus layered inside-distance mass (KO ≈ 21%; submission ≈ 8%). Aoriqileng concentrates upset mass in KO windows (≈ 18%) with supplementary grind/decision residuals (≈ 15%) if damage optics flip scorecards plus the hook submission bucket (≈ 6%). Conviction anchors at 6/10 owing to pairwise statistical separation moderated by Cody's still-thin UFC sample.