
Kai Asakura vs Cameron Smotherman
Bantamweight Bout • UFC Fight Night: Song vs. Figueiredo
Saturday, May 30, 2026 • 30 ft cage (Galaxy Arena, Macau)
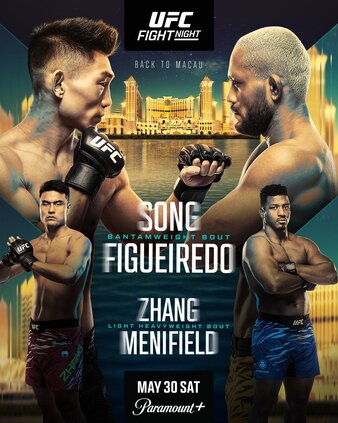
Explore Detailed Fighter Profiles
Click on either the fighter's name or profile image for each fighter to access comprehensive UFC statistics including striking metrics, grappling data, clinch performance, complete fight history, offensive & defensive analytics, and round-by-round breakdowns.
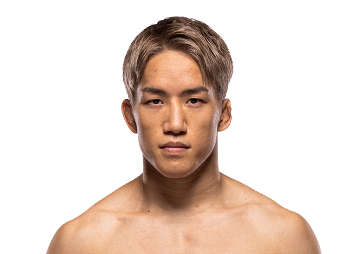
Kai Asakura
Fighter Metrics
Victory Methods
Win Round Distribution

Cameron Smotherman
Fighter Metrics
Victory Methods
Win Round Distribution
📋 Last 5 Fights - Kai Asakura
| Date | Opponent | Result | Method |
|---|---|---|---|
| 2025-08-16 | Tim Elliott | L | Submission - Guillotine Choke (R2, 4:39) |
| 2024-12-07 | Alexandre Pantoja | L | Submission - Rear Naked Choke (R2, 2:05) |
| 2023-12-31 | Juan Archuleta | W | TKO - Knee to Body & Punches (R2, 3:20) |
| 2023-05-06 | Yuki Motoya | W | KO - Knee to Body (R3, 2:25) |
| 2021-12-31 | Hiromasa Ougikubo | L | Decision - Unanimous (R3, 5:00) |
📋 Last 5 Fights - Cameron Smotherman
| Date | Opponent | Result | Method |
|---|---|---|---|
| 2025-06-14 | Ricky Simon | L | Decision - Unanimous (R3, 5:00) |
| 2025-05-03 | Serhiy Sidey | L | Decision - Unanimous (R3, 5:00) |
| 2024-10-19 | Jake Hadley | W | Decision - Unanimous (R3, 5:00) |
| 2024-06-08 | Alberto Mondala | W | Submission - Anaconda Choke (R3, 4:12) |
| 2023-11-18 | Ryan Kuse | W | Decision - Split (R3, 5:00) |
Technical Analysis
Technical Score
Cardio Score
Overall Rating
📊 Technical Score
Estimated Technical Score uses Striking Composite (39 vs 47) and Grappling Composite (33 vs 38) from the Macau breakdown — thin UFC samples (2 vs 3 fights) but aligned with official striking/grapple rates and RXR round reads.
💪 Cardio Score
Based on average fight duration, striking rate per minute, takedown rate, and finish rate. Measures cardiovascular endurance and ability to maintain pace throughout fights.
🎯 Overall Rating
Simple average of Technical Score and Cardio Score. Provides a holistic view of fighter capabilities combining skill level with physical conditioning and fight performance.
Striking Composite
Grappling Composite
Technical Radar Comparison
Visual comparison of key performance metrics between both fighters
📊 Detailed Statistical Comparison
🥊 Fight Analysis Breakdown
🧩 Kai Asakura Key Advantages
Pro sheet still screams damage-first MMA: 13 KO/TKOs, three submissions, and RIZIN-era knees to the body that stopped Juan Archuleta (R2) and Yuki Motoya (R3). UFC flyweight ended twice by submission, but the career arc is still front-loaded kill shots — if one intercept knee connects clean at bantamweight, scorecards become secondary.
RXR validates a bimodal striker: against Alexandre Pantoja he opened 15 of 26 significant strikes (five of six to the body) before the grappling cliff. That is the disciplined, layered counter game Smotherman least wants to deal with — high connect without spamming empty swings.
UFC ledger shows only 38 landed significant strikes across four RXR rounds, but roughly 71% targeted the head — clear hunt mode. When urgency spikes (Tim Elliott: 11 of 45 then 10 of 42), accuracy collapses toward mid-20s and grapplers punish posture. The upside remains intercept knees and counters off linear entries in open space.
⚠️ Unfavorable Scenarios
When behind on optics, Asakura has spammed ~87 significant attempts across two rounds at roughly 24% accuracy versus Elliott — empty calories against anyone comfortable banking touches. Smotherman lives in that 30-plus attempt-per-round ecosystem (492 UFC attempts logged across nine RXR rounds).
No UFC third-round sample exists while Smotherman closed Jake Hadley with a 34-of-105 attempt storm in Round 3. Going down 0-2 on cards into that profile is historically hostile territory unless earlier damage flipped judges.
📋 Likely Gameplan
Layer body work to open the head, refuse 40-plus swing rounds, and force respect before loading knees — replicate the 57% efficient sequences from Pantoja's opening frame, not the desperation versus Elliott.
Cut angles instead of chasing straight lines; pair outside footwork with low kicks to dull Smotherman’s bounce, then meet his jab lanes with step-in knees — the large cage helps only if Asakura manages distance rather than donating runway.
🚀 Cameron Smotherman Key Advantages
Official UFC striking rates nearly double Asakura’s output while absorbing virtually identical damage per minute (~3.52 vs 3.53 SApM). RXR aggregates show 183 landed significant strikes across nine rounds versus 38 across four — judges repeatedly see Smotherman working.
58% striking defense and 62% takedown defense on the UFC sheet outpace Asakura’s 52%/50% marks — crucial when one man hunts intercept shots while the other floods zones with jab chains and body invested doubles (Hadley fight blueprint).
Against Hadley his attempts climbed 37/79 → 25/75 → 34/105 — he wins optics late even at depressed accuracy because the commission sees relentless volume. All three UFC bouts went the full 15 minutes, proving pacing trust unavailable in Asakura’s short-sample UFC ledger.
⚠️ Unfavorable Scenarios
RXR shows a disastrous 1-of-6 significant striking Round 1 versus Ricky Simon when minute theft erased his rhythm early. Asakura only needs one clean intercept narrative to anchor judges before volume ramps.
Sidey proved nearly even striking totals still lose when opponents stack control; Asakura will not replicate that wrestling grind, but knees erase minute advantages instantly — Smotherman cannot cruise on low-damage volume if receipts are loud.
📋 Likely Gameplan
Open with immediate touches — never repeat the Simon energy — then reinvest in body work (Hadley Round 1 mixed targeting) before climbing upstairs once reads settle.
Use center resets and lateral exits to avoid knee traps, push toward 32-plus attempts per round when safe, and steer clear of pocket trades that feed Asakura’s historical KO density — win minutes, not singular swings.
🎯 Fight Prediction Analysis
Data-driven prediction model based on statistical analysis
📊Detailed Analysis Summary
🏟️Cage Dynamics
Galaxy Arena's 30-foot cage rewards resets for a high-volume boxer who wants to jab-layer and circle, while simultaneously punishing Asakura if he linearly chases without cutting lanes. The breakdown frames this as pure kickboxing variance unless someone forces a layer change: neither fighter shows UFC RXR takedown initiation, so minutes likely accrue at distance—exactly where Smotherman has logged nine straight scored rounds versus Asakura's four-round UFC sample.
🎯Technical Breakdown
Official UFC striking lines diverge sharply: Smotherman's 4.07 SLpM and 37% accuracy against 2.27 SLpM and 32% for Asakura while both absorb ~3.5 significant strikes per minute. RXR sums echo the story—492 attempts versus 116 across their UFC samples—with Smotherman stacking ~32.7 attempts per round. Defense tilts to Smotherman as well (58% vs 52% StrDef, 62% vs 50% TDDef), though neither posts offensive wrestling on the ledger.
🧩Key Battle Areas
Thermometer reads separate cleanly: Smotherman ramps attempts into Round 3 (Hadley's 105-swing final frame) whereas Asakura's best UFC optics arrived early (Pantoja Round 1 efficiency) before grappling emergencies. Simon's control clock (8:13) and Sidey's grappling stamps illustrate how Smotherman loses minutes when opponents steal posture—even if Asakura is unlikely to replicate that wrestling workload. Conversely Elliott's chaos showed how empty volume invites submissions once posture fractures.
🏁Final Prediction
Model outcome remains Cameron Smotherman by decision (~37% of all outcomes) via compounded touches and third-round storms when damage stays muted. Asakura's plurality finish lane (~27% absolute KO/TKO) hinges on disciplined entries—not Elliott spam—and early knees that flip optics before scorecards slip away.
💰 Betting Analysis: Model vs Market
Detailed value assessment in the betting market
📊Market Odds
🤖Analytical Model
💎Value Opportunities
MAXIMUM VALUE
Model: ~37% all outcomes | Fair-style price from breakdown
GOOD VALUE
Model: ~27% absolute finish lane | Knee spike leverage
SLIGHT VALUE
Breakdown fair-style ~51% — volume banker vs finish spike
⚠️Key Market Discrepancies
- • Thin UFC tape on Asakura – only four RXR rounds; market may overweight flyweight scars vs fresh 135 debut.
- • Small-sample TD defenses – 50% vs 62% swings wildly if another grappling layer appears (unlikely on RXR but historically pivotal for both résumés).
- • Big-cage optics – resets fuel Smotherman, but Sidey-like even striking losses still happen if judges feel damage flipped rounds.
🎯 Comprehensive Probabilistic Analysis
100 hypothetical fight simulation based on statistical data
🏆Outcome Distribution - Kai Asakura
Needs Pantoja discipline across minutes without Elliott spam
Primary upset lane — knees and intercept counters at 135
Rare — neither shows UFC RXR offensive grappling
💥Outcome Distribution - Cameron Smotherman
Hadley blueprint — bank touches even at lower accuracy
Accumulation lanes if Asakura fades without landing knees
Regional Anaconda proof — not UFC RXR offense so far
⏰Fight Timeline Analysis
⚡Window of Opportunity - Cameron Smotherman
- • Minutes 10–15: Escalate attempts like the Hadley R3 105-swing frame when damage stays quiet.
- • Open with touches: Kill Simon-like R1 blanks before optics anchor against Asakura.
- • Body-first layering: Open the head once reads settle without brawling into knees.
🎯Damage Spike Plan - Kai Asakura
- • Minutes 0–8: Land the knee intercept or rack clean counters before volume debt stacks.
- • Pantoja discipline: Mixed targeting, ~57% efficient spells beat spam lanes for judges.
- • Forbidden pattern: Elliott-mode 40+ swing rounds at ~24% accuracy donate rounds automatically.
🎯 Final Confidence Assessment
Confidence level and uncertainty factors
Confidence Level
Thin UFC tape + division migration tension vs converging RXR volume reads
✅Supporting Factors
- • Smotherman SLpM (+1.8) and StrDef (+6) edges with nine UFC RXR rounds of proof
- • Third-round escalation template (Hadley) vs no UFC R3 data for Asakura
- • Neither posts UFC offensive wrestling — defaults stand-up read Smotherman builds
- • Asakura Pantoja R1 efficiency proves elite connect ceiling when calm
⚠️Risk Factors
- • Asakura KO equity (~62% pro KO wins) shrinks Smotherman's margin instantly
- • Division migration after flyweight submission losses injects narrative volatility
- • statistical record aggregates still sparse — UUID career stats not yet linked per breakdown
🏁Executive Summary
Picture three acts in the large cage: Round 1 is a coin flip — either Pantoja-disciplined Asakura lands layered counters or Smotherman mirrors Hadley/Sidey activity while dodging the Simon blank. Round 2 is where finishing DNA matters most; volume climbing favors Smotherman when Asakura over-swings into Elliott rhythms. Round 3 still skews Smotherman on paper because Hadley's 34-of-105 attempt closer is documented whereas Asakura has no UFC proof he survives that storm without prior hurt.
Bottom line from the breakdown: Smotherman wins the majority of neutral kickboxing simulations; Asakura wins the plurality of finish-forward simulations where knees land early. Hero read — Minutes vs missiles — Smotherman builds totals; Asakura hunts the swing-round weapon.
Prediction: Model leans Smotherman ~58% with decision (~37% absolute) the modal route; Asakura's live lane stays concentrated in KO/TKO (~27% absolute) if selective mechanics hold and knees cash before scorecards slip.