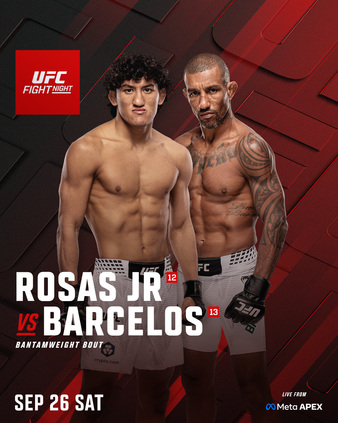
PRELIMS · BANTAMWEIGHT · 3 ROUNDSUFC Fight Night: Rosas Jr. vs. Barcelos
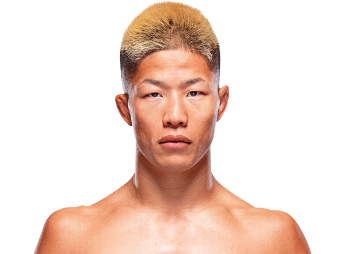
Rinya Nakamura — Bantamweight fighter

Rinya Nakamura

Hybrid
10W1L
Elite-Entry Wrestler
VS
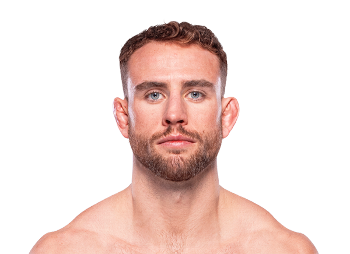
Brady Hiestand — Bantamweight fighter

Brady Hiestand

Bam Bam
9W2L
Submission Grappler

Measured wrestling control against a length-backed submission threat

BantamweightMeta APEX, Las Vegas, Nevada, United StatesSeptember 26, 202625ft Octagon (Small Cage)
01

The Frame

Measured wrestling against a length-backed submission threat

The Analyst's Take

Wrestling control against scramble submission equity — and both men failed the same test. Rinya Nakamura brings a complete UFC statistical profile: 3.10 SLpM, 82% takedown accuracy, 100% takedown defense (sample-flagged) and a 62-second Fletcher finish after the Kang loss. Brady Hiestand brings a verified UFC.com line — 2.70 SLpM, 4.80 TD/15, 1.07 Sub/15, 51% striking defense — plus a 3-1 Octagon ledger and rear-naked choke finish over Garrett Armfield in June 2024. The shared Kang loss keeps conviction low; Hiestand's four career submission wins keep the upset lane wide. Lean: Nakamura 55-45, conviction 3 out of 10.

Rinya Nakamura
Attribute
Brady Hiestand
30
Age
28
5'7"
Height
5'8"
68.5"
Reach
+2.5" Hiestand71"
40"
Leg Reach
Not supplied
Not supplied
Stance
Orthodox
135 lb
Weight
135 lb
4-1Thin Hiestand sample
UFC Record
~2-2
Wrestler
Fighting Style
Grappler / submission specialist

Hiestand owns three inches of height and 3.5 inches of reach at bantamweight. Nakamura's wrestling entries and low 1.7 significant strikes absorbed per minute have historically overcome shorter frames, but against another grappler who hunts necks in scrambles, the length edge matters in open-space rounds.

Venue Factor
The Meta APEX small cage compresses lateral movement and can shorten the distance to Nakamura's takedown entries — a structural subsidy for 82% takedown accuracy. The counter is that faster scrambles keep Hiestand's four-career-submission threat live even when he loses the initial level change.
02

The Fighters

Full Nakamura dossier vs editorial Hiestand career evidence

Rinya Nakamura fighter photo

Rinya Nakamura

Pro Record
10-1-0
UFC Record
4-1
Streak
Won 1 — R1 TKO vs Fletcher after Kang loss
Finish Rate
60% (6 of 10 wins)
Avg Fight Time
11:24 (dossier)
Chin · No stoppage losses; sole defeat is a decisionSOS · UFC bantamweight — Kang, Hernandez, Kazama, GarciaElite-entry wrestler with low absorption

Four straight UFC wins preceded a unanimous-decision loss to Kyung Ho Kang at UFC 311. Nakamura rebounded with a 62-second first-round TKO of Nathan Fletcher, confirming he can finish without a prolonged grappling marathon.

Brady Hiestand fighter photo

Brady Hiestand

Pro Record
8-2-0
UFC Record
~2-2 — thin sample
Streak
Lost 1 — UD vs Kang at UFC 311
Finish Rate
63% (5 of 8 wins)
Avg Fight Time
Not supplied
Chin · One UFC submission loss (Durden); no KO losses suppliedSOS · UFC bantamweight — limited sampleSubmission-first grappler

The TUF 29 finale rear-naked choke over Ricky Turcios established his Octagon identity. A Cody Durden submission loss and a Kyung Ho Kang unanimous-decision defeat are the key UFC warning signs. Injury layoffs add variance the thin sample cannot fully stabilize.

Rinya Nakamura
0 dealt · 0 absorbed
Knockdown Exchange
KD dealt vs absorbed
Brady Hiestand
0 dealt · 0 absorbed

Rinya Nakamurasignature weapons

Elite Takedown Entries82% takedown accuracy and 2.63 TD/15 from repository dossier
×0
Ground-and-Pound / Body AttackFletcher R1 1:02; Garcia TKO R2 1:32
×2

Brady Hiestandsignature weapons

Rear-Naked ChokeRicky Turcios, TUF 29 finale — clearest Octagon proof point
×1
Submission (career)50% of eight career wins by submission — identity path
×4

Rinya Nakamura

W
Nathan Fletcher
TKO — Punches / body kick
RR1 (1:02)
UFC Fight Night — recent
L
Kyung Ho Kang
Decision — Unanimous
RR3
UFC 311 — Jan 18, 2025
W
Carlos Hernandez
Decision — Unanimous
RR3
UFC — Feb 17, 2024
W
Toshiomi Kazama
Decision — Unanimous
RR3
UFC — Sep 23, 2023
W
Fernie Garcia
TKO — Punches
RR2 (1:32)
UFC — Apr 15, 2023
Pattern

Four wins and one loss in five. The Kang decision is the warning; the Fletcher first-round blitz is the bullish counter-signal. Three consecutive decision wins before Kang show fifteen-minute capability.

Brady Hiestand

L
Kyung Ho Kang
Decision — Unanimous
RR3
UFC 311 — Jan 18, 2025
L
Cody Durden
Submission
RR2
UFC — editorial
W
Louis Cosce
Decision — Unanimous
RR3
UFC — editorial
W
Ricky Turcios
Submission — RNC
RR2
TUF 29 Finale — 2021
W
Regional opponent
Submission
RR1
Pre-UFC — editorial
Pattern

Two losses in the last three UFC outings after the TUF run. Both defeats came against wrestler-grappler types who either submitted him (Durden) or out-grinded him over three rounds (Kang).

Rinya Nakamura

Win Methods
Wins by Round

Brady Hiestand

Win Methods
Wins by Round
Critical Insight
Nakamura finishes more by strikes than submissions despite the wrestler label; the Fletcher stoppage reinforces the recent trend. Hiestand's identity is submission-first with four career choke wins. Round bars use dossier and editorial timing proxies, not a complete UFC distribution for Hiestand.

Common Opponents

OpponentRinyaBrady
Kyung Ho KangL— Unanimous Decision, R3 (UFC 311)L— Unanimous Decision, R3 (UFC 311)
Both men failed the same test on the same card — the cleanest comparative anchor in an asymmetric dataset.
03

The Numbers

Repository UFC rates for Nakamura, flagged editorial gauges for Hiestand

Striking

Repository composite vs editorial estimate

0.0
Rinya
0
Bradysmall sample

Nakamura's 3.10 SLpM at 52% accuracy with only 1.7 SApM is a positive differential for a wrestler. Hiestand has no stable UFC striking line.

Grappling

Repository composite vs editorial estimate

0.0
Rinya
0
Bradysmall sample

Nakamura's 82% TD accuracy and 1.46 Sub/15 edge Hiestand's four career submission wins, tempered by the Durden defensive warning.

Technical

(Striking + grappling) / 2

0.0
Rinya
0
Bradysmall sample

Moderate separation built from measured Nakamura data and flagged Hiestand editorial scores.

Cardio

Decision history + recent activity

0
Rinya
0
Bradysmall sample

Both have three career decision wins. Nakamura's longer recent UFC activity gives a slight lean.

Overall

(Technical + cardio) / 2

0
Rinya
0.0
Bradysmall sample

Supports a 55-45 lean without implying blowout certainty.

MetricRinyaBrady
UFC Record4-1~2-2small sample
Avg Fight Time11:24N/Asmall sample
Career Submission Wins14
Career KO Wins51
Stoppage Losses01 (sub)
Round-by-Round DataDossier proxies onlysmall sampleNone suppliedsmall sample

Archetype Base Rate

Elite-Entry Wrestler 55%45% Submission Grappler

Analytical forecast · The 55-45 lean comes from Nakamura's measured wrestling profile and recent Fletcher finish, capped by the shared Kang loss and Hiestand's submission equity.

Rinya NakamuraBrady Hiestand

Bantamweight

· 0 fighters
StatRinyaRinya rankDiv avgBrady rankBrady
SLpM3.10N/A
Str Acc52%N/A
Str Def64%N/A
SApM1.7N/A
TD/152.63N/A
TD Acc82%N/A
TD Def100% ⚠N/A
Sub/151.46N/A
Pro Record10-1-08-2-0
UFC Record4-1~2-2 ⚠
KO Win %50% (5 of 10)13% (1 of 8)
Submission Wins14
Reach68.5"72"
Shared OpponentL UD vs KangL UD vs Kang
Statistical Verdict
Nakamura owns every measurable UFC rate row. Hiestand's counter-evidence is career method breadth, length and the shared Kang loss. Nakamura's 100% takedown defense is sample-sensitive and is not labeled elite without qualification.

Significant Strikes Landed per Round

R1, R2, R3: single-fight sample for Rinya Nakamura

R1, R2, R3: single-fight sample for Brady Hiestand

Control Time per Round (sec)

Rinya Nakamura

  • No complete RxR rows were supplied in the dossier. Chart values remain null; timing proxies come from recent results.
  • Fletcher R1 1:02 and five career first-round finishes keep early danger live.
  • Three consecutive decision wins before Kang show fifteen-minute capability.

Brady Hiestand

  • No usable round-by-round UFC rows for Hiestand. Every chart value remains null.
  • Durden submission loss in Round 2 is the defensive grappling warning.
  • Kang unanimous-decision loss shows he can reach the cards but not win them against elite pace.
Critical Insight
Round 1 slightly favors Nakamura's recent finishing form. Round 2 is the highest-variance grappling window. Round 3 remains viable for both given three decision wins apiece.

Strike Targeting (career avg)

No UFC strike-target data for either fighter — nothing is estimated.

Head hunting vs body work vs leg attack — the shape of the damage. Fighters without UFC samples are omitted rather than shown as 0%.

Range Profile — where the minutes go

Rinya · N/ABrady · N/A

No UFC range-share data for either fighter — nothing is estimated.

Share of significant-strike volume by range from UFC career data. Debutants / fighters without Octagon samples show as N/A.

04

The Story of the Fight

The Kang mirror, wrestling control and scramble submission equity

Where the fight lives

Who owns each phase — and by how much
Open SpaceBrady owns it

Hiestand's +3.5" reach at distance

Entries / Level ChangesRinya owns it

82% takedown accuracy

Top ControlRinya owns it

Repository grappling composite 68.6

ScramblesEven

Hiestand's four submission wins vs Durden defensive warning

Path to Victory

Rinya Nakamura

Close distance, chain takedowns with 82% accuracy, control top position and finish by ground-and-pound or bank damage for a decision.

Why they win
01
Elite takedown accuracy

82% accuracy and 2.63 TD/15 from the repository dossier.

02
Low absorption

Only 1.7 significant strikes absorbed per minute — can shoot without heavy counter-tax.

03
Takedown defense

100% TD defense in dossier — sample-flagged but directionally strong.

04
Fresh finishing form

62-second Fletcher TKO after the Kang setback.

05
Better UFC ledger

4-1 Octagon record vs Hiestand's ~2-2 thin sample.

The gameplan
  1. 1
    Compress early

    Use Fletcher-template body kicks and level changes before Hiestand sets range.

  2. 2
    Chain wrestle

    82% takedown accuracy is the primary separator — shoot off striking, not naked entries.

  3. 3
    Top control first

    Prioritize position and ground-and-pound over reckless submission hunts.

  4. 4
    Protect the back

    Deny prolonged back exposure during scrambles.

  5. 5
    Bank rounds

    Three career decision wins show the cards are a legitimate path.

Path to Victory

Brady Hiestand

Use 72-inch reach to manage space, survive entries and hunt rear-naked chokes in scrambles and transitions.

Why they win
01
Submission identity

Four career submission wins vs Nakamura's one — TUF finale RNC proof.

02
Length edge

+3.5 inches of reach and three inches of height at bantamweight.

03
Shared Kang loss

Proves he can survive fifteen minutes against the same opponent who beat Nakamura.

04
Scramble equity

Messy entries open his best choke-hunting windows.

05
Decision floor

Three career decision wins — cards remain a live path.

The gameplan
  1. 1
    Manage range

    Use the 72-inch reach to jab and exit before Nakamura closes.

  2. 2
    Clinch without conceding

    Make Nakamura work in tie-ups without giving easy takedowns.

  3. 3
    Hunt the neck

    Front-headlock and back-take sequences in transitions — TUF-proven route.

  4. 4
    Avoid bottom

    Extended bottom grappling against the superior wrestler is the losing lane.

  5. 5
    Push late volume

    Kang template — increase output if the fight reaches Round 3.

Danger Zone

How Rinya Nakamura loses

  • Extended scrambles where Hiestand attaches to the back before top control is secured.

  • A repeat of the Kang pacing problem without successful takedown entries.

  • Fighting at Hiestand's preferred range for three rounds without control time.

Danger Zone

How Brady Hiestand loses

  • Nakamura's chain wrestling creates safe top control and ground-and-pound — a Durden-type loss in reverse.

  • Another high-pace decision against an opponent who absorbs less and lands cleaner entries.

  • The small cage compresses space before Hiestand establishes jab rhythm.

Shared opponent anchor

The Kang Mirror

Both lost to Kyung Ho Kang by unanimous decision at UFC 311. Nakamura responded with a first-round finish; Hiestand's response is this booking.

UD
result vs Kang for both
Measured edge vs live choke equity

Wrestler vs Grappler

Nakamura's 68.6 grappling composite and 82% TD accuracy oppose Hiestand's four career submission wins and Durden-loss defensive warning.

82%
Nakamura takedown accuracy
Hiestand's open-space edge

The Length Tax

Three inches of height and 3.5 inches of reach favor Hiestand in kickboxing range. The small APEX cage assists Nakamura's entries.

+3.5"
reach advantage Hiestand
Recent momentum

Finishing Form Divergence

Nakamura's Fletcher blitz vs Hiestand's two losses in three UFC outings — form favors the wrestler but the sample is small.

No zero substitution

Missing Means Missing

Hiestand has no stable UFC rate line. Nakamura's 100% TD defense is sample-sensitive. No odds or ranks were supplied.

The Five-Round Clock

Rinya Nakamura danger windowBrady Hiestand danger windowNeutral / contested
R1 · 0:00–5:00Recent early finishing

Fletcher R1 1:02 and five career first-round stoppages keep Nakamura's early danger live.

Critical Insight
Round 1 favors Nakamura's recent finishing. Round 2 is the scramble window where Hiestand's submission equity peaks. Round 3 slightly favors Nakamura's control if the fight reaches the cards.

Finish Threat by Round

Share of each fighter's wins that end in each round — early finishers spike left, grinders rise right.

05

The Verdict

One hundred scenarios — wrestling control vs scramble chokes

If you only read 3 things
1

Nakamura 55% / Hiestand 45%, conviction 3/10 — measured wrestling against length-backed submission threat.

2

Nakamura owns the only complete UFC rate profile — 82% TD accuracy, 1.7 SApM and a recent Fletcher R1 finish. Hiestand owns four career submission wins and a length edge.

3

Both lost to Kyung Ho Kang by unanimous decision at UFC 311. Hiestand by submission (22%) is the largest single outcome bucket.

100 Simulated Fights

Nakamura Decision 20%Nakamura KO/TKO 18%Nakamura Submission 17%Hiestand Decision 16%Hiestand Submission 22%Hiestand KO/TKO 7%

Each square = 1 simulated fight. Rinya Nakamura gold · Brady Hiestand orange · full color = decision, 70% = submission, 45% = KO/TKO.

Measured wrestling edge

Nakamura's 82% TD accuracy, 100% TD defense (sample-flagged) and 68.6 grappling composite.

Submission threat

Hiestand's four career submission wins and TUF-proven rear-naked choke.

Shared Kang loss

Both failed the same test at UFC 311; Nakamura bounced back with a R1 finish.

Physical frame

Hiestand's +3.5-inch reach keeps open-space rounds competitive.

Data asymmetry

Full Nakamura profile vs thin Hiestand UFC sample caps conviction at 3/10.

Fight Scripts

0%
of simulations

Nakamura's Control Grind

Takedowns, top control and either ground-and-pound or a decision built on damage and control time.

Scripted outcomes for Rinya Nakamura vs Brady Hiestand — how each version of this fight unfolds.

Rinya Nakamura win probability
0%
18%
20%
17%
KO/TKODECSUB
  • Eighteen points. Five career KO/TKO wins and the recent Fletcher first-round finish.

  • Twenty points. Three career decision wins and three-round UFC experience before the Kang loss.

  • Seventeen points. 1.46 Sub/15 and one career submission win — live but secondary to control finishes.

Brady Hiestand win probability
0%
7%
16%
22%
KO/TKODECSUB
  • Seven points. One career knockout win — not the primary path.

  • Sixteen points. Three career decision wins; Kang loss shows he can reach the cards but not always win them.

  • Twenty-two points — largest single bucket. Four career submission wins and TUF finale RNC proof.

Projected Scorecards

How the model scores each round
R1
Rinya
R2
Brady
R3
Rinya
29-28 Nakamura
Control and damage in two of three rounds
Preferred distance outcome
29-28 Hiestand
Range work and scramble success hold across two rounds
Plausible underdog path
30-27 either way
One fighter's stylistic edge dominates
Possible, not analytically preferred

Moneyline

Rinya Nakamura
Not posted
Brady Hiestand
Not posted

No BetOnline line was supplied. The 55-45 split converts to approximate fair prices of Nakamura -122 and Hiestand +122 before bookmaker margin.

Props: model vs market

PropOddsImplied %Model %FairEdgeVerdict
Best Value
No bet recommended. Hiestand by submission is the largest individual bucket at 22%, and conviction is only 3/10. A market would need to diverge materially from the 55-45 line before this sample gap could justify action.
Conviction
0
3/10

A five-point lean built from Nakamura's measured wrestling profile and recent Fletcher finish, capped by the shared Kang loss and Hiestand's submission equity. Lean: Rinya Nakamura.

What backs the lean
  • Full UFC rate profile with 82% takedown accuracy and 1.7 SApM.

  • 4-1 Octagon ledger and recent first-round TKO after the Kang setback.

  • 68.6 grappling composite vs editorial 58 for Hiestand.

What limits it
  • Both lost to Kyung Ho Kang — the shared failure prevents a strong lean.

  • Hiestand's four submission wins and +3.5-inch reach keep scramble routes live.

  • Durden submission loss proves Hiestand can finish grapplers; thin UFC sample prevents precise comparison.

  • No supplied odds or division ranks.

Final Assessment

This is a wrestler-vs-grappler matchup with a measurable edge on one side and live submission equity on the other. Nakamura brings the only complete UFC statistical profile: positive striking differential for his archetype, elite takedown accuracy and a recent first-round finish that confirms upward trajectory after the Kang setback.

The 55-45 lean goes to Nakamura because the measured wrestling and control profile creates more repeatable paths to victory than Hiestand's scramble-dependent submission routes. Hiestand by submission is the single largest individual bucket at 22%, reflecting real choke equity.

Pick: Rinya Nakamura 55% / Brady Hiestand 45%. Conviction remains 3/10, and no bet is recommended without a market and fuller Hiestand data.

Skip to main content
Use Tab to navigate through elements, Enter to activate buttons and links.