
Women's BantamweightNOT FIGHTING

Bea Malecki
4Wins-1Losses
Age
31
Height
5'9"
Weight
135 lbs
Reach
74"
Avg Fight Time
08:58
Gym
Team Malecki
Wins By
1 KO · 2 Sub · 1 Dec
Losses By
—
Wins by Rd
R2 1R3 1
Last 3
LWW
Finish Rate
75%
Bonuses
—
Style
MMA
Location
Stockholm, Sweden
Fight History
LOSS
JN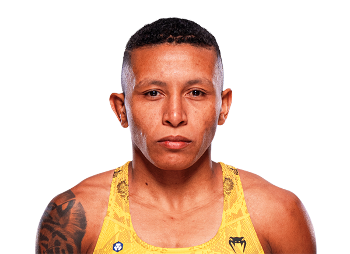
vs Josiane Nunes
UFC Fight Night: Cannonier vs. Gastelum· 2021-08-21
KO/TKO
Punch to Head At Distance
R1 4:54
KO/TKOPunch to Head At Distance·R1 4:54
WIN
VH
vs Veronica Hardy
UFC Fight Night: Lee vs. Oliveira· 2020-03-14
Decision - Unanimous
R3 5:00
Decision - Unanimous·R3 5:00
WIN
DS
vs Duda Santana
UFC Fight Night: Gustafsson vs. Smith· 2019-06-01
Submission
Rear Naked Choke
R2 1:59
SubmissionRear Naked Choke·R2 1:59
Fighter Archetype
Muay Thai Fighter
Clinch-Heavy Nak Muay
Why This Archetype
This fighter displays a unique approach that transcends traditional archetypes.
Striking
6.8/min
Grappling
0.00 TD
Defense
62%
⚖️Bea adapts strategy based on opponent — no predictable tendencies
📊Balanced approach can be difficult to game-plan against
01
Technique DNA
Striking Foundation
4 rounds of fight film analyzed
🎯
Signature Technique
Elbows
Core of offensive identity
Dominant Level
75%
Of striking volume
Mastery Progress
Primary Arsenal
High Importance
Spinning
75%of arsenal
0%100%
Medium Importance
Head Kicks
50%of arsenal
0%100%
Supporting Techniques
⭐Other
Knees
50%
🦵Leg Strike
Leg Kicks
25%
⭐Other
Overhands
25%
Striking Pattern Analysis
- ◆Signature technique: Heavy reliance on Elbows (75%). Opponents must prepare specifically for this threat.
- ▲Technical diversity: Multiple techniques used at similar rates - adapts based on situations.
- ●Comprehensive striker: Uses head strikes, leg kicks, and varied attacks across distance.
- ■Two-pillar system: Top 2 techniques account for majority (150%) of offensive output.
- ◇Focused arsenal: Top 5 techniques comprise 275% of offense - limited but refined.
- ▶Mixed martial artist: Uses both takedown techniques and submissions in the striking phase.
- ★Adaptive tempo: Switches between pressure and counter-fighting mid-round.
02
Finish Techniques
Striking Finishes
0
0% of career finishes
Submission Finishes
1
100% of career finishes
🔒 Submission Arsenal (1 techniques, 1 total finishes)
Other
Submission
#11
100% of subs
Finish Pattern Analysis
- ⚡🔒 Submission specialist: 100% of career finishes via submission. Elite grappling with dangerous ground finishing.
- 🎯🔐 Specialized submission: Relies exclusively on Submission (1x). Single-threat grappling finisher.
03
Fighter Skills Radar
Key Insights
🥊
Striking specialist: Dominates with devastating volume and accuracy. Avoids ground exchanges.💪
Peak strengths: Strikes/Min (6.8) and Strike Def% (62%).⚠️
Vulnerability: TD Acc% is below average (0/100). Opponents exploit this.🔥
Finisher: 75% of wins end in finish (1 KO + 2 subs).🛡️
Defensive stance: Strong defense (62%) limits opponent output. Conservative approach.🚫
Anti-wrestler: 79% TD defense. Keeps fights standing.📈
Pace builder: Output increases in later rounds (128% in R3). Outworks opponents.04
Striking Profile
Striking Accuracy
46%
Average
0%100%
Striking Defense
62%
Above Avg
0%100%
Range Breakdown
Distance
40% acc87%
Clinch
78% acc6%
Ground
59% acc7%
Striking Differential-0.12/min
6.84 landed/min6.96 absorbed/min
6.84
Landed/Min
6.96
Absorbed/Min
0.00
KD Avg
0
1st Rd Finishes
Sig. Strikes Landed184
Sig. Strikes Attempted400
Key Insights
Bea is a distance-first striker, with 87% of output at range.
Effective body attack (28%).
Distance-dominant: 87% of output at range with 40% accuracy.
High pace fighter: 8.5 strikes/min engagement.
05
Grappling Profile
TD Accuracy
0%
Low
0%100%
TD Defense
79%
Elite
0%100%
0.00
TD / 15min
1.12
Sub / 15min
0
TD Landed
0
TD Attempted
Extended Grappling
Submission Timing
2 total attempts
Opportunistic
R1
0%
R2
100%
R3
0%
Key Insights
Solid TD defense at 79%.
Active submission threat (1.12/15min).
Submission timing: "Opportunistic" — consistent threat.
06
Offensive vs Defensive Balance
Damage Exchange
Offensive dominance vs damage absorbed per fight
Dealt
368
0.98
Ratio
Absorbed
374
Chin Rating
AverageKD Exchange
0/2
KD Recovery
0%
Pace & Momentum
Fight pacing and round-over-round performance trends
Engagement Score
44.0
High
Strikes/Min
8.5
Standing %
85%
R3 vs R1 Output
128%
Key Insights
⚠️ Damage ratio below 1.0 (0.98x) - absorbs more than deals.
🛡️ Defensive specialist - rarely gets knocked down relative to knockdowns given.
⚙️ High engagement score (44.0) - maintains relentless pace.
📈 Improves dramatically in late rounds - R3 output 128% of R1.
07
Round-by-Round Profile
Career average across 3 fights
R1 Control
--
R2 Control
1:32
R3 Control
1:29
R1 to Final
+60%
In-Fight Adaptation
Detected across career, comparing R1 vs R3+ patterns
Shifts to headhunting late (+14.9pp in R3).
Target Selection Evolution
Head
+14.9pp
Body
-3.0pp
Leg
-12.0pp
Range Preference Evolution
Ground Shift
+4.3pp
Round Patterns
⬆️ Improves with fight duration – strong finishing power
💪 Peak performance in final round
08
Competitive Profile
Strength of Schedule
Opponent quality and career progression
Avg Opponent ELO
2499
ModerateCareer-wide opponent strength
Conclusions Summary
Fighter characteristics, strengths, patterns, and competitive insights