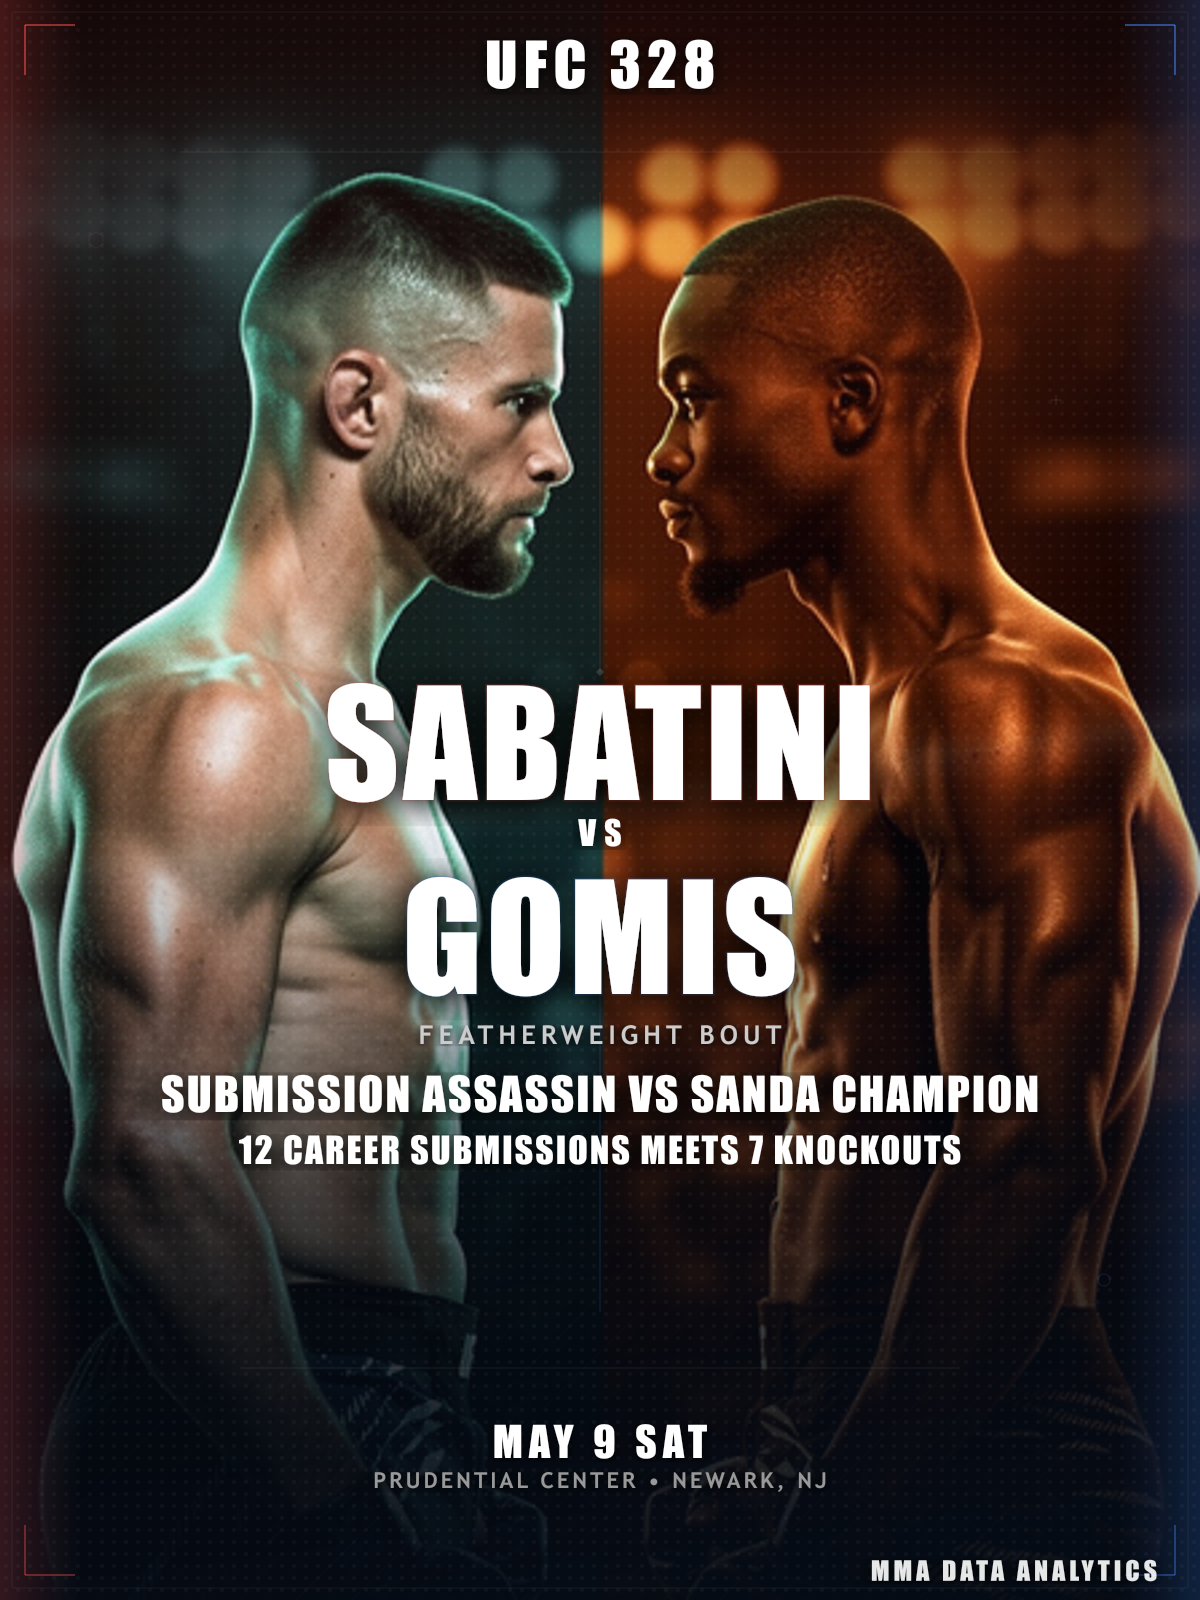
Pat Sabatini vs William Gomis
Featherweight Bout • UFC 328: Chimaev vs. Strickland
Saturday, May 9, 2026
Explore Detailed Fighter Profiles
Click on either the fighter's name or profile image for each fighter to access comprehensive UFC statistics including striking metrics, grappling data, clinch performance, complete fight history, offensive & defensive analytics, and round-by-round breakdowns.
Pat Sabatini
Fighter Metrics
Victory Methods
Win Round Distribution
William Gomis
Fighter Metrics
Victory Methods
Win Round Distribution
📋 Last 5 Fights - Pat Sabatini
| Date | Opponent | Result | Method |
|---|---|---|---|
| Nov 15, 2025 | Chepe Mariscal | W | Decision (Unanimous) (R3, 5:00) |
| Apr 5, 2025 | Joanderson Brito | W | Decision (Unanimous) (R3, 5:00) |
| Oct 12, 2024 | Jonathan Pearce | W | Submission (RNC) (R1, 1:35) |
| Nov 11, 2023 | Diego Lopes | L | KO/TKO (Punches) (R1, 1:30) |
| Jun 17, 2023 | Lucas Almeida | W | Submission (Arm Triangle) (R2, 3:45) |
📋 Last 5 Fights - William Gomis
| Date | Opponent | Result | Method |
|---|---|---|---|
| Sep 6, 2025 | Robert Ruchała | W | Decision (Unanimous) (R3, 5:00) |
| Mar 1, 2025 | Hyder Amil | L | Decision (Split) (R3, 5:00) |
| Sep 28, 2024 | Joanderson Brito | W | Decision (Split) (R3, 5:00) |
| Sep 2, 2023 | Yanis Ghemmouri | W | TKO (Body Kick) (R3, 2:20) |
| Apr 22, 2023 | Francis Marshall | W | Decision (Split) (R3, 5:00) |
Technical Analysis
Technical Score
Cardio Score
Overall Rating
📊 Technical Score
Calculated as the average of Striking Composite (66.0 vs 66.0) and Grappling Composite (78.0 vs 55.0). Balances overall striking effectiveness with grappling ability to measure complete technical skills.
💪 Cardio Score
Based on average fight duration, striking rate per minute, takedown rate, and finish rate. Measures cardiovascular endurance and ability to maintain pace throughout fights.
🎯 Overall Rating
Simple average of Technical Score and Cardio Score. Provides a holistic view of fighter capabilities combining skill level with physical conditioning and fight performance.
Striking Composite
Grappling Composite
Technical Radar Comparison
Visual comparison of key performance metrics between both fighters
📊 Detailed Statistical Comparison
🥊 Fight Analysis Breakdown
🧩 Pat Sabatini Key Advantages
Sabatini's 4.48 takedowns per 15 minutes against Gomis's 0.97 is a 4.6x differential that fundamentally reshapes every minute of this fight. The Pennsylvania grappler doesn't hunt single clean shots—he chains attempts, cycling between ankle picks off broken jab exchanges, body-lock trips against the fence, and outside single-leg drives that convert Gomis's lateral movement into positional vulnerabilities. His 50% takedown accuracy means half of all attempts land clean, and with 1.5 submission attempts per 15 minutes, each floor sequence carries genuine finish threat rather than just control time. For Gomis, there is no safe response: defending takes energy, accepting the takedown means surviving BJJ chains. His one career submission loss on record is a direct warning sign when facing a Daniel Gracie black belt who has submitted 12 opponents across the full range of positions.
Sabatini's 62% striking accuracy is among the highest in the featherweight division—22 percentage points above Gomis's 40%. While his 1.87 SLpM output looks conservative on paper, the efficiency of each strike compounds across three rounds. He absorbs only 1.22 strikes per minute against Gomis's 2.19, creating a 0.97 SApM differential that represents nearly a full strike per minute saved from damage accumulation. This matters because Sabatini uses his accurate strikes instrumentally—as takedown setups, not standalone attacks. A clean jab that lands at 62% triggers a defensive shell in Gomis, which is exactly the head position Sabatini needs for a guillotine entry or a level change into a body lock. In three-round fights where one flashy round can sway a card, Sabatini's clean output without the defensive cost gives him a structural scoring advantage even in exchanges where he isn't the busier fighter.
Sabatini's 12 career submission wins account for 57% of his total victories—an unusually high rate that reflects not just skill but a deliberate system. His primary weapons are the guillotine choke (caught in transition from failed takedown entries), the arm triangle (secured from side control or mount after scrambles), and the rear-naked choke (from back takes following guard passes). These aren't opportunistic catches—they're sequential setups where one failed sub attempt creates the defensive arm position for the next. Gomis's single career submission loss confirms this threat is real, not theoretical. His Sanda background, while elite for kickboxing, offers limited preparation for managing a systematic BJJ practitioner who hunts submissions from every position including bottom guard and half-guard, where many strikers feel false security. Once Sabatini has floor time, Gomis must spend cognitive and physical energy surviving rather than building toward his own offense.
⚠️ Unfavorable Scenarios
Gomis has 7 career KO/TKO wins at 47% of his total victories—a genuinely dangerous finish rate for featherweight. His 3-inch reach advantage (73" vs 70") and 4-inch height differential create a natural counter position when shorter fighters commit to entry distance. Sabatini's level changes require covering roughly 3-4 feet of distance against a 6'0" southpaw, and the southpaw right cross angle lands precisely where a lowering head travels during a shot. Two of Sabatini's five career losses came by KO/TKO, confirming the knockout template exists. The critical window is Rounds 1–2 before Sabatini's wrestling attrition begins to drain Gomis's explosiveness. If Gomis reads one of Sabatini's predictable entry patterns and times the counter right hand, this fight ends without reaching the floor—Sabatini's primary battleground.
If Sabatini is unable to close distance consistently, Gomis's 2.79 SLpM output and 60% striking defense create a clear point-winning formula at range. With a 4-inch height and 3-inch reach advantage, Gomis can control distance through lateral movement, fire jab-cross-kick combinations, and reset before Sabatini re-establishes pressure. Gomis's 62% takedown defense means that roughly one in three of Sabatini's attempts gets turned away cleanly—and each stuffed shot costs Sabatini energy while earning Gomis a positional reset. If two rounds pass with Sabatini unable to consistently convert takedowns, Gomis's striking volume creates a cumulative scoring lead that even a third-round submission attempt may not overcome on the cards.
📋 Likely Gameplan
Sabatini's optimal path begins with forward pressure and a persistent jab that narrows the effective range from 73" down to collar-tie distance. His 62% accuracy means he can afford to be the first to land—triggering a defensive reaction in Gomis, then converting that reactive posture into a level change or body-lock trip. Against a southpaw, orthodox wrestlers often find better angles on the left side; Sabatini should look to force Gomis's back toward the cage by cutting off lateral exits with forward steps and angled pressure. Even fence trips that don't fully convert count—they pin Gomis against the cage, generate control seconds, and burn energy reserves that compound meaningfully across three rounds.
Once the fight reaches the floor, Sabatini's priority is positional advancement that forces specific defensive arm reactions from Gomis. From side control, he should look to establish mount or threaten the arm triangle—Gomis's natural response of framing and bridging opens the near-arm for a choke entry. From guard, the guillotine on re-guard attempts is Sabatini's highest-percentage submission from bottom. His 1.5 sub attempts per 15 minutes reflects a system where each position flows to the next finish threat; Gomis cannot simply "survive" on the ground without giving up control time and submission exposure simultaneously. The lose-lose dynamic that Sabatini's BJJ creates—tap or give the judges a dominant round—is his most powerful weapon in this matchup.
🚀 William Gomis Key Advantages
Gomis's 6'0" frame and 73" reach against Sabatini's 5'8" / 70" creates a structural range advantage that shapes every phase of this fight. At featherweight, a 4-inch height differential is substantial—it raises Gomis's hips above single-leg entry height, makes double-leg entries require more penetration distance, and allows him to land long strikes while Sabatini is still mid-approach. His Sanda pedigree (4x French national champion, European champion, 100% Fight champion) means this range management isn't theoretical—it's been forged against opponents who wanted to close distance and couldn't. Gomis's 60% striking defense reflects exactly that competency: avoiding clean shots while maintaining his preferred striking distance. As a southpaw, his left-side stance also puts his power right hand on the centerline against an orthodox opponent, creating natural counter angles on every one of Sabatini's forward advances.
Gomis finishes 47% of his wins by KO/TKO—a remarkable rate for featherweight—and his body of work shows a clear pattern: body kick campaigns that sap the midsection, followed by head strikes once the guard drops. His TKO victory over Yanis Ghemmouri by body kick in Round 3 is the clearest illustration: he hunted the liver across multiple rounds before the finish. Against Sabatini, the body kick becomes tactically crucial—targeting the midsection on every takedown entry attempt depresses Sabatini's explosiveness and raises the cost of level changes. His 2.79 SLpM is 49% higher than Sabatini's 1.87, meaning Gomis outworks him decisively in pure volume when upright. At 28 years old—seven years younger—Gomis also carries fresher legs and a higher ceiling for explosive output late in rounds when Sabatini's wrestling workload begins to accumulate in his own body.
⚠️ Unfavorable Scenarios
Once Sabatini brings the fight to the floor, Gomis enters his most dangerous territory. His single career submission loss is a confirmed vulnerability—and Sabatini's system specifically exploits opponents who defend one submission by giving up another. The sequential chaining from failed guillotine to arm triangle to back take creates an exhausting escape process that costs Gomis both energy and scoring ground simultaneously. There is no clean exit: getting up requires surviving the submission attempts, and surviving the submissions requires accepting control time and positional losses. With only 0.97 TD/15 of his own, Gomis has virtually no wrestling offense to answer with—he cannot drag Sabatini down or threaten the floor on his own terms. The ground game is entirely Sabatini's domain, and Gomis must prevent it from becoming the story of any given round.
Even when Gomis successfully defends Sabatini's 4.48 TD/15 pace, the energy expenditure is not neutral—every sprawl, every hip escape, every fence battle drains Gomis's cardiovascular reserves that he would otherwise deploy for his striking output. This attrition creates a compounding deficit across three rounds: a Gomis who enters Round 3 having defended eight or nine takedown attempts in the preceding twelve minutes is not the same explosive Sanda striker who opened Round 1. His 2.19 strikes absorbed per minute—nearly double Sabatini's 1.22—means he is already taking more cumulative damage upright. Layer wrestling attrition on top of that striking damage budget, and Gomis arrives at late-round exchanges diminished while Sabatini—who burns far less energy per minute through conservative striking and efficient wrestling—remains fresher and sharper. The attrition model is Sabatini's backup when the submission isn't landing.
📋 Likely Gameplan
Gomis's optimal strategy centers on a three-weapon range system: the teep to reset distance when Sabatini closes, the jab to score points and create head movement reactions, and the body kick as the primary fight-shaping tool. His TKO victory over Ghemmouri via body kick in Round 3 showed what this system can produce when maintained consistently. Against Sabatini, the body kick is especially valuable because it targets the exact muscles used for takedown drives—a liver-kicked opponent does not shoot with the same explosiveness three exchanges later. Gomis should throw this weapon early and often, even if individual kicks don't produce immediate damage, building a cumulative midsection tax that compounds through the later rounds and creates the counter-right-hand opening he needs for the finish.
Gomis's KO finish window lives in one specific moment: the half-second when Sabatini commits his head forward into a level change. The southpaw right cross travels on a diagonal line that intersects perfectly with a lowering orthodox head—this is not a speculative counter, it's a structural collision. Sabatini's two KO losses confirm he can be caught during entries, and as a high-volume takedown artist, he will present this target repeatedly across three rounds. Gomis should train himself to recognize Sabatini's entry cues—shoulder dip, weight shift, head position—and fire the right cross with commitment rather than defensively posting. A staggering shot early in Round 1 or 2 doesn't just create a finish opportunity; it forces Sabatini to hesitate on subsequent entries, disrupting the very foundation of his game and opening the entire striking game for the Frenchman.
🎯 Fight Prediction Analysis
Data-driven prediction model based on statistical analysis
📊Detailed Analysis Summary
🏟️Cage Dynamics
The cage functions as a dynamic variable in this matchup—initially benefiting Gomis's range game, then progressively serving Sabatini's pressure system. In the opening minutes of Round 1, Gomis's 6'0" frame and 73" reach allow him to establish the 8-10 foot striking distance where his Sanda combinations land safely and his footwork creates the lateral angles needed to fire and reset without being caught by takedown entries. His southpaw stance compounds the positional advantage: his right cross travels naturally into the path of an advancing orthodox head, and his teep disrupts forward movement before Sabatini can close to collar-tie range. But as Sabatini establishes forward momentum—cutting off lateral exits, posting at the fence, and executing repeated body-lock pressure—the cage perimeter transforms from Gomis's safe zone into a compression tool. Against the fence, Gomis cannot use his footwork, his reach loses relative value, and Sabatini's body-lock mechanics have the positional leverage to generate rides and trips. The fight's physical geography shifts decisively between rounds, which is why Gomis must accumulate maximum scoring damage in Round 1 before Sabatini dictates the geography in Rounds 2 and 3.
🎯Technical Breakdown
The statistical profile of this matchup tells the story of two fighters who are excellent at entirely different things, with limited overlap in their skill sets. Sabatini's 4.48 TD/15 versus Gomis's 0.97 is not just a 4.6x differential—it means Sabatini will attempt a takedown roughly every 3.3 minutes of fight time, while Gomis will initiate one every 15+ minutes. In a three-round fight, Sabatini projects 9-12 takedown attempts versus Gomis's 0-2. At 50% success rate, Sabatini converts 4-6 clean takedowns per fight. Each conversion averages 1-2 minutes of floor control, producing 4-12 minutes of dominance per fight. Gomis's counter-argument is damage efficiency: his 2.79 SLpM represents nearly 25% more striking output per minute upright, and if the fight features predominantly standing exchanges, Gomis wins the volume battle clearly. But Sabatini's 62% accuracy versus 40% means Sabatini's shots land at a 55% higher rate—the numbers favor volume for Gomis but precision for Sabatini. Sabatini's 1.22 SApM versus Gomis's 2.19 creates a 0.97-strike-per-minute damage savings that compounds into roughly 15-18 fewer clean strikes absorbed across a full 15-minute fight—a meaningful cumulative edge for three-round judge evaluation.
🧩Key Battle Areas
Three specific battles will determine which fighter's narrative wins on the scorecards. First: the wrestling volume equation. Gomis's 62% takedown defense is above average, but it means Sabatini still converts at a projected 38% rate against initial single shots—and his chain wrestling adds a second and third attempt layer that defense percentages don't fully capture. The question isn't whether Gomis can stuff shots; it's whether he can stuff the third and fourth attempt in a sequence while managing striking defense simultaneously. Second: the counter right hand timing battle. Every time Sabatini's head drops below Gomis's shoulder level, a finish opportunity exists. This happens 9-12 times per fight at Sabatini's TD rate. Gomis needs only one well-timed counter right to dramatically alter the fight's trajectory—but he must earn it through active range management rather than waiting reactively. Third: late-round energy management. Gomis absorbs 2.19 strikes per minute while also defending 4.48 takedown attempts per 15 minutes—a combined workload that will show in Round 3 explosiveness. Sabatini's 1.22 SApM suggests he manages his own energy expenditure with discipline, arriving at late rounds proportionally fresher. Whichever fighter better manages this energy equation in Round 3 likely wins the fight.
🏁Final Prediction
Sabatini by Decision (35% probability) represents the most likely path—three rounds of takedown pressure, fence trips, and control time accumulation that builds an undeniable positional argument on the cards, even in rounds where Gomis wins the striking exchanges. Sabatini by Submission (30%) is the highest-value betting outcome: 12 career submissions across guillotines, arm triangles, and RNCs combined with Gomis's one career submission loss creates a credible finish scenario that the market under-prices. Together, these two Sabatini paths account for 67% of projected outcomes—making him the clear statistical favorite despite the market's likely compressed line given Gomis's physical advantages and KO power. Gomis's primary upset path is KO/TKO (20%), centered on the counter right hand during Sabatini's level changes, the body kick campaign slowing Sabatini's explosive entries, or a combination of both. This window is real—two of Sabatini's losses came by KO—but it narrows as rounds progress and wrestling attrition takes hold. Gomis's decision path (13%) requires the rare scenario where he successfully defends 4-5 takedowns per round for three consecutive rounds while accumulating enough striking to outscore Sabatini's control impressions—possible, but demanding a near-perfect performance against one of featherweight's most relentless grapplers.
💰 Betting Analysis: Model vs Market
Detailed value assessment in the betting market
📊Market Odds
🤖Analytical Model
💎Value Opportunities
MAXIMUM VALUE
Model: 30% | Fair: +233 — 12 career subs and Gomis has a submission loss on record
GOOD VALUE
Model: 20% | Fair: +400 — 7 career KOs and knockout threat on level changes
SLIGHT VALUE
Model: 35% | Fair: +186 — grind-heavy wrestling decisions are Sabatini's signature
⚠️Key Market Discrepancies
- • Underprices submission finishing – Sabatini's 12 career sub wins are elite; market treats him as a decision grinder.
- • Overweights Gomis striking upside – 4.48 TD/15 from Sabatini means the Frenchman rarely gets sustained range time.
- • Age-bias on Sabatini – Grappling-heavy fighters peak late; 35 is not a red flag in wrestling-dominant styles.
🎯 Comprehensive Probabilistic Analysis
100 hypothetical fight simulation based on statistical data
🏆Outcome Distribution - Pat Sabatini
Primary path via wrestling control and ride time
Guillotine or arm triangle from chained floor sequences
Unlikely — Sabatini's damage profile is controlled
💥Outcome Distribution - William Gomis
Counter right hand or body kick on Sabatini's entry
Requires sustained range fighting + TD defense all 3 rounds
Sabatini rarely finishes standing; 0 KO wins in UFC
⏰Fight Timeline Analysis
⚡Window of Opportunity - William Gomis
- • Round 1: Best KO equity before Sabatini's wrestling rhythm sets.
- • Counter right on entry: Time Sabatini's level changes with the southpaw cross.
- • Body kick campaign: Deplete Sabatini's core to slow takedown drives.
🎯Progressive Dominance - Pat Sabatini
- • Fence pressure: Body-lock trips and wall-work burn Gomis's hips early.
- • Chained subs: Arm triangles and guillotines create finish windows from every position.
- • Attrition edge: Low SApM (1.22) means Sabatini stays sharper deep into rounds.
🎯 Final Confidence Assessment
Confidence level and uncertainty factors
Confidence Level
Solid grappling edge tempered by Gomis's KO power on entries
✅Supporting Factors
- • Elite takedown volume: 4.48 vs 0.97 TD/15 (4.6x differential)
- • 12 career submissions — Gomis has 1 sub loss on record
- • 62% striking accuracy limits clean shots absorbed
- • Conservative damage profile: 1.22 SApM vs 2.19
⚠️Risk Factors
- • Gomis KO power: counter right on Sabatini's level changes
- • 4" height and 3" reach disadvantage for Sabatini at range
- • Two of Sabatini's 5 losses came by KO/TKO
🏁Executive Summary
Pat Sabatini's systematic grappling approach should steadily drag this fight to the mat and accumulate control time through chain-wrestling sequences, while William Gomis's best equity centers on landing the counter right hand or body kick during Sabatini's takedown entries. The statistical differentials heavily favor Sabatini on the ground: his 4.48 TD15 vs Gomis's 0.97 represents a 4.6x takedown volume advantage, and 12 career submissions against a fighter who has been submitted before creates a credible finish route. Sabatini's 1.22 SApM vs Gomis's 2.19 reflects a damage economy that compounds through three rounds—the Pennsylvania grappler takes less cumulative punishment while executing a wrestling-heavy game that judges reward. Gomis does bring real KO danger (7 career KOs, 47% finish rate) and physical advantages at 6'0" with 73" reach, making Round 1 his most dangerous window before Sabatini's wrestling rhythm establishes dominance.
Prediction: Sabatini by Decision most likely (35% probability) via takedown control and ride time accumulation; Submission (30%) is the highest-value outcome given his elite BJJ and Gomis's grappling vulnerability. Gomis's upset lane is KO/TKO (20%) via counter striking on Sabatini's level changes—his southpaw right hand and body kick history make this a credible but short window.