
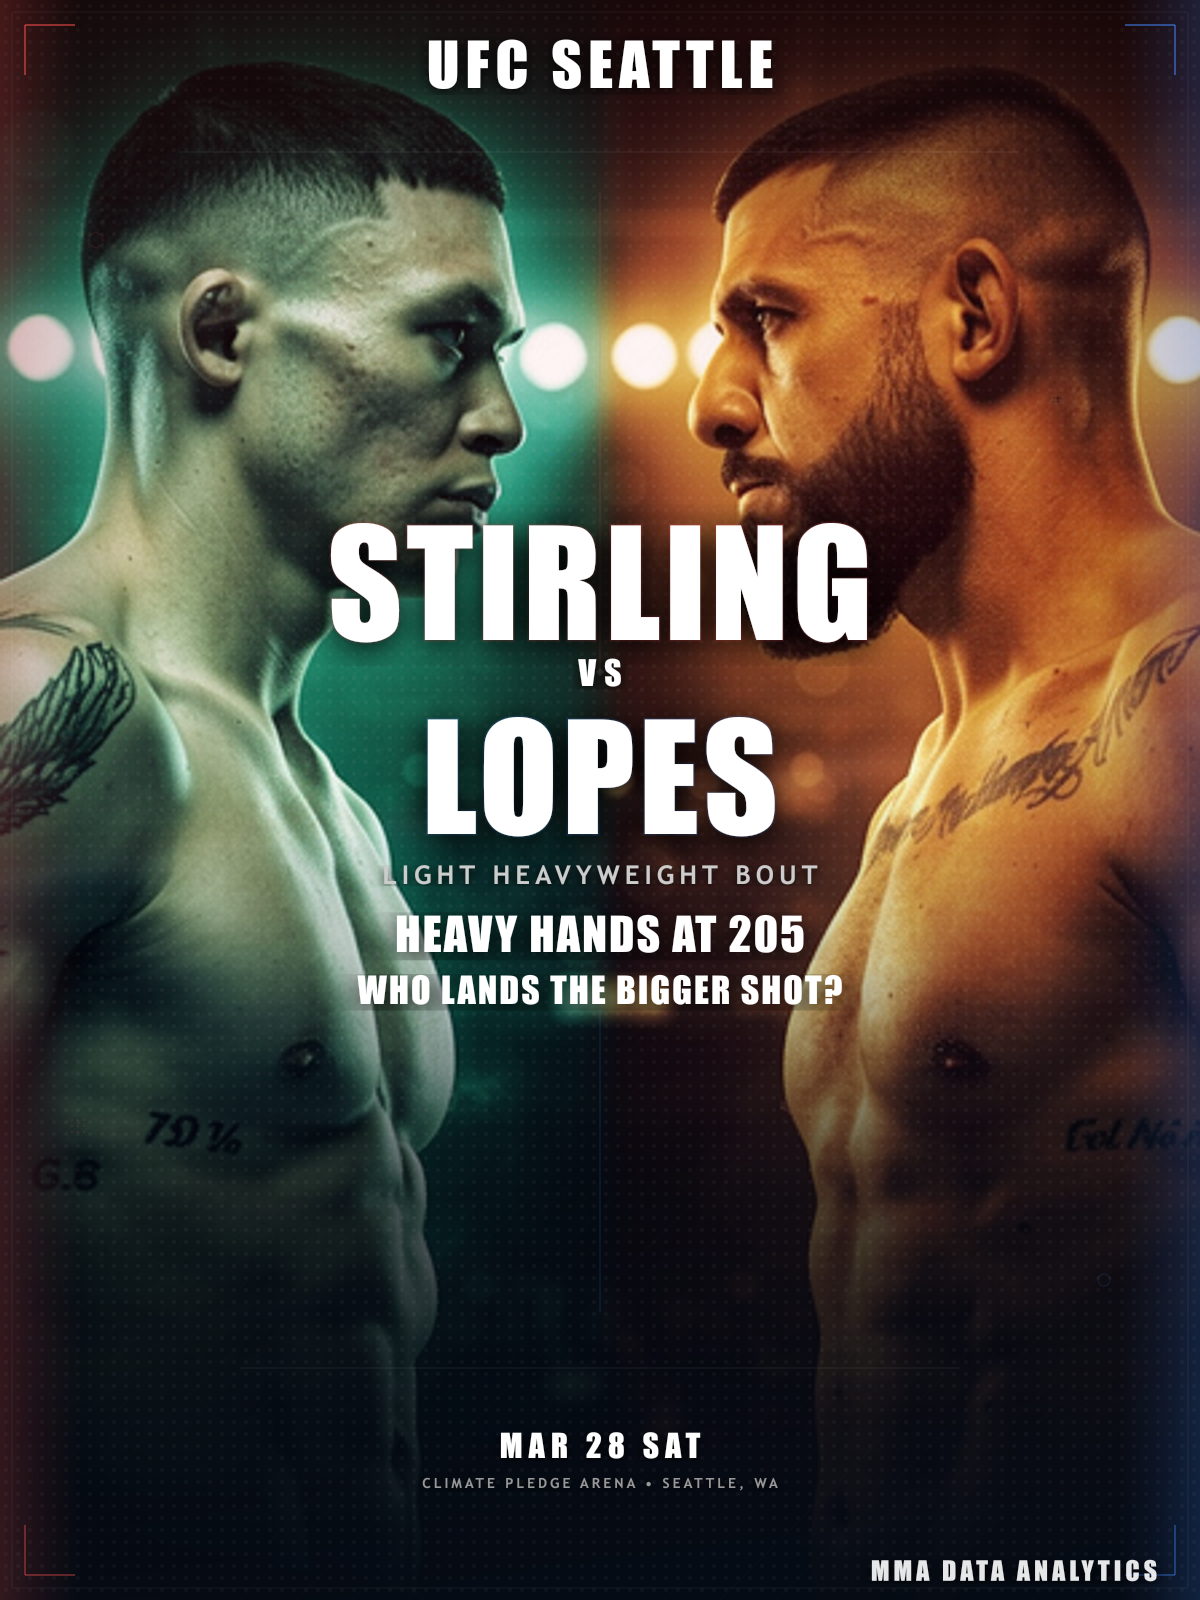
Navajo Stirling vs Bruno Lopes
Men's Light Heavyweight Bout • UFC Fight Night: Adesanya vs Pyfer
Saturday, March 28, 2026
Explore Detailed Fighter Profiles
Click on either the fighter's name or profile image for each fighter to access comprehensive UFC statistics including striking metrics, grappling data, clinch performance, complete fight history, offensive & defensive analytics, and round-by-round breakdowns.
Navajo Stirling
8-0-0
Navajo Stirling
Fighter Metrics
Victory Methods
Win Round Distribution
Bruno Lopes
Fighter Metrics
Victory Methods
Win Round Distribution
📋 Last 5 Fights - Navajo Stirling
| Date | Opponent | Result | Method |
|---|---|---|---|
| Sep 27, 2025 | Rodolfo Bellato | W | U-DEC (R3, 5:00) |
| May 10, 2025 | Ivan Erslan | W | U-DEC (R3, 5:00) |
| Dec 14, 2024 | Tuco Tokkos | W | U-DEC (R3, 5:00) |
| Sep 10, 2024 | Phillip Latu | W | KO/TKO (Left Hook) (R2, 2:21) |
| Jun 14, 2024 | Sam Kei | W | KO/TKO (Strikes) (R3, 1:48) |
📋 Last 5 Fights - Bruno Lopes
| Date | Opponent | Result | Method |
|---|---|---|---|
| May 31, 2025 | Dustin Jacoby | L | KO/TKO (Left Hook) (R1, 1:50) |
| Jan 11, 2025 | Magomed Gadzhiyasulov | W | U-DEC (R3, 5:00) |
| Aug 13, 2024 | Mikheil Sazhiniani | W | KO/TKO (Punches to Body) (R2, 4:14) |
| Jan 27, 2024 | Marcos Brigagão | W | SUB (Arm Triangle Choke) (R2, 4:58) |
| Sep 05, 2023 | Brendson Ribeiro | L | KO/TKO (Punches) (R1, 3:47) |
Technical Analysis
Technical Score
Cardio Score
Overall Rating
📊 Technical Score
Calculated as the average of Striking Composite (66.0 vs 66.0) and Grappling Composite (78.0 vs 55.0). Balances overall striking effectiveness with grappling ability to measure complete technical skills.
💪 Cardio Score
Based on average fight duration, striking rate per minute, takedown rate, and finish rate. Measures cardiovascular endurance and ability to maintain pace throughout fights.
🎯 Overall Rating
Simple average of Technical Score and Cardio Score. Provides a holistic view of fighter capabilities combining skill level with physical conditioning and fight performance.
Striking Composite
Grappling Composite
Technical Radar Comparison
Visual comparison of key performance metrics between both fighters
📊 Detailed Statistical Comparison
🥊 Fight Analysis Breakdown
🧩 Navajo Stirling Key Advantages
Stirling's 6.13 SLpM vs Lopes' 2.81 represents a 2.18x volume advantage that creates massive scoring differentials in every minute the fight remains standing. His 52% accuracy ensures these strikes are clean and meaningful, while his high output forces opponents into reactive shells. This volume edge becomes particularly crushing over three rounds as Stirling's pace never drops—his three UFC decision wins all went the full distance with consistent output. Lopes' 57% striking defense will be tested by a volume he has never encountered at this level.
Stirling absorbs only 2.60 strikes per minute while landing 6.13—a net striking rate of +3.53 per minute that compounds decisively over 15 minutes. His 58% striking defense means he rarely takes clean damage, while his output ensures judges see a clear aggressor every round. Lopes' 3.38 SApM absorption rate means he takes more damage than Stirling while producing far less offense. This damage economy differential creates a scoring framework where Stirling wins every round he keeps the fight standing, building a virtually insurmountable lead on the scorecards.
Stirling's 79-inch reach vs Lopes' 74-inch creates a massive 5-inch differential that allows him to strike from distance where Lopes cannot reciprocate. Combined with his 6'4" height (2 inches taller), Stirling can employ a jab-heavy approach, long uppercuts, and teeps that keep Lopes at bay. In the 30-foot cage, this reach advantage becomes even more pronounced—Stirling can control distance, force Lopes to overcommit on entries, and time counters as the Brazilian closes range. Historical data shows reach advantages of 5+ inches correlate strongly with striking dominance at range.
⚠️ Unfavorable Scenarios
Stirling's 75% takedown defense is solid but faces its toughest test against Lopes' 2.51 TD15 output. If Lopes can establish a wrestling tempo and drag the fight to the mat, Stirling's striking volume advantage evaporates. Lopes' 100% takedown defense in the UFC suggests he can nullify Stirling's occasional offensive wrestling while imposing his own grappling game. Extended ground time would fundamentally alter the fight's trajectory.
Lopes carries serious KO power with 6 KO/TKO wins out of 14 victories. If the fight devolves into early power exchanges before Stirling can establish his rhythm and range, the Brazilian's heavy hands could create flash knockdown opportunities. Stirling's 58% striking defense, while decent, means he's absorbing 42% of incoming strikes—and Lopes only needs one clean shot to shift momentum dramatically. The first 5 minutes represent Stirling's highest-risk window.
📋 Likely Gameplan
Stirling should exploit his 5-inch reach advantage by establishing a jab-heavy approach from the opening bell. His 6.13 SLpM output means he can outwork Lopes at distance while minimizing the Brazilian's ability to close range for power exchanges or takedowns. By maintaining the fight at kicking range and using teeps and long crosses, Stirling can build an insurmountable lead on the scorecards while keeping Lopes frustrated and out of position.
Stirling must prioritize takedown defense and cage awareness. His 75% TDD provides a solid foundation, but he should actively circle away from the fence to deny Lopes cage-wrestling opportunities. When Lopes shoots, Stirling should sprawl hard and immediately disengage rather than engage in extended grappling exchanges where Lopes' superior submission game becomes a factor. Keeping the fight standing is the single most important tactical objective for Stirling in this matchup.
🚀 Bruno Lopes Key Advantages
Lopes' 2.51 takedowns per 15 minutes vs Stirling's 1.15 represents a 2.18x differential in offensive wrestling activity. More importantly, Lopes' grappling background includes 5 submission victories—giving him dangerous finishing ability on the mat. His 100% takedown defense in the UFC means he won't be taken down, while his offensive wrestling creates path-to-victory scenarios that bypass Stirling's striking advantages entirely. If Lopes can secure consistent takedowns, he can neutralize the fight's standing dynamics and impose his preferred pace on the mat.
While Lopes is outgunned in volume, his 85.7% career finish rate (12 finishes in 14 wins) demonstrates he rarely needs a decision to win. His 6 KO/TKO victories show legitimate one-punch power that can end the fight at any moment. Against a volume striker like Stirling who commits to exchanges, Lopes' counter-power becomes particularly dangerous. The Brazilian's ability to end fights explosively means Stirling can never coast—even building a comfortable lead doesn't guarantee safety against Lopes' finishing instincts.
⚠️ Unfavorable Scenarios
Stirling's 6.13 SLpM output is relentless and creates a pace that Lopes has never faced. If the fight stays standing for extended periods, Lopes' 2.81 SLpM simply cannot match Stirling's volume, creating massive point differentials every round. Lopes' 57% striking defense means he's absorbing 43% of incoming strikes—and against Stirling's volume, that translates to significant cumulative damage over 15 minutes.
Lopes' 74-inch reach faces a 5-inch deficit against Stirling's 79 inches. This means Lopes must close significant distance to land his power shots, exposing himself to counters during entry. Stirling's height advantage (6'4" vs 6'2") compounds this problem, as Lopes must punch upward while entering against longer weapons. In the 30-foot cage, this range disadvantage makes Lopes' entries predictable and creates opportunities for Stirling to time counterpunches.
📋 Likely Gameplan
Lopes' best path to victory involves closing the distance quickly, establishing the clinch, and working for takedowns against the cage. His 2.51 TD15 rate gives him the tools to execute this, and once on the mat, his submission threat (5 career subs) creates legitimate finish opportunities. By forcing a grappling-heavy fight, Lopes can neutralize Stirling's massive striking volume advantage and fight in the range where he's most dangerous.
Lopes should look to land power shots early before Stirling establishes his rhythm and range. The Brazilian's KO power is his great equalizer—a single clean overhand or hook could end the fight before Stirling's volume advantage takes hold. Lopes should mix his entries between takedown attempts and explosive striking combinations, keeping Stirling guessing about whether to defend high or low. Front-loading damage in Round 1 is essential to shift the fight dynamics in his favor.
🎯 Fight Prediction Analysis
Data-driven prediction model based on statistical analysis
📊Detailed Analysis Summary
🏟️Cage Dynamics
The 30-foot octagon significantly favors Stirling's range-based approach. His 79-inch reach and 6'4" frame allow him to control distance from the center of the cage, using the extra space to establish his jab and long strikes before Lopes can close. Lopes needs to cut off the cage and corner Stirling to land power shots or secure takedowns, but the larger cage makes this pursuit more energy-intensive. Stirling's ability to circle, reset, and fire from range turns the 30-foot octagon into his personal striking gallery—a dynamic that progressively favors him as Lopes expends energy chasing across more ground.
🎯Technical Breakdown
The statistical analysis reveals a clear stylistic clash: Stirling's volume striking supremacy (6.13 vs 2.81 SLpM, a 2.18x differential) against Lopes' grappling threat (2.51 vs 1.15 TD15). The fight outcome hinges on which domain dominates. Stirling's 52% accuracy and 58% defense create a favorable damage economy (+3.53 net strikes per minute), while Lopes' 85.7% career finish rate and 100% UFC TDD suggest he can be dangerous if he controls where the fight takes place. The key metric is time standing vs time on the mat—Stirling dominates the former while Lopes has legitimate advantages in the latter.
🧩Key Battle Areas
Three critical battle areas will determine the outcome: Stirling's range management vs Lopes' entries, takedown defense vs grappling pressure, and Round 1 power exchanges vs late-round volume. Stirling's 75% takedown defense is the fulcrum—if he can stuff Lopes' attempts and keep the fight standing, his 6.13 SLpM volume creates an almost unbeatable scoring framework. Conversely, if Lopes can chain takedowns and establish mat control, his 5 career submissions provide legitimate finishing ability. The 4-year age gap (28 vs 32) and Stirling's superior cardio score (78 vs 55) suggest the New Zealander's advantages compound over three rounds while Lopes' power window progressively shrinks.
🏁Final Prediction
The most likely outcome is Navajo Stirling by Decision (35% probability), achieved through consistent volume striking, range management, and damage economy over three rounds. Stirling's KO/TKO path (18%) becomes viable if his volume accumulates visible damage and Lopes' chin weakens from sustained output, particularly in later rounds. Lopes' primary upset lane centers on KO/TKO (20%) via power shots during entries or clinch exchanges where his heavy hands neutralize Stirling's reach. Lopes' submission path (10%) requires securing takedowns and maintaining top position— a scenario that depends heavily on bypassing Stirling's 75% takedown defense. Decision win for Lopes (8%) is the least likely path as his volume cannot match Stirling's output over three full rounds.
💰 Betting Analysis: Model vs Market
Detailed value assessment in the betting market
📊Market Odds
🤖Analytical Model
💎Value Opportunities
MAXIMUM VALUE
Model: 50% | Fair: +100
GOOD VALUE
Model: 12% | Fair: +730
SLIGHT VALUE
Model: 59% | Fair: -170
⚠️Key Market Discrepancies
- • Overweights KO volatility – Underprices Stirling's decision dominance pathway.
- • Undervalues reach differential – 5-inch reach gap creates systematic range control advantages.
- • Wrestling blind spot – Lopes' arm triangle finishing ability creates undervalued upset pathway.
🎯 Comprehensive Probabilistic Analysis
100 hypothetical fight simulation based on statistical data
🏆Outcome Distribution - Navajo Stirling
Primary path via volume striking and range control
Accumulation TKO via volume and counters on entry
Rare opportunistic catch on Lopes' entries
💥Outcome Distribution - Bruno Lopes
Power counter during entry or pocket exchange
Arm triangle choke from side control after takedown
Grinding split decision via wrestling control
⏰Fight Timeline Analysis
⚡Window of Opportunity - Bruno Lopes
- • First 5 minutes: Highest KO equity via power shots on entry.
- • Clinch wrestling: Takedowns against cage to access submission game.
- • Arm triangle threat: Side control finish if takedowns land cleanly.
🎯Progressive Dominance - Navajo Stirling
- • Range control: 79" reach and 6'4" frame establish distance from Round 1.
- • Volume accumulation: 6.13 SLpM creates insurmountable scoring leads.
- • Late rounds: Cardio advantage (78 vs 55) becomes decisive in Round 3.
🎯 Final Confidence Assessment
Confidence level and uncertainty factors
Confidence Level
Strong edge via volume striking, reach advantage, and City Kickboxing tactical system
✅Supporting Factors
- • Overwhelming 5-inch reach and 2.18x volume striking advantage
- • City Kickboxing tactical system with proven range management
- • Elite cardio (78 score) with increasing output over 3 rounds
- • Lopes has 2 career R1 KO losses against longer strikers
⚠️Risk Factors
- • Stirling's untested chin and bottom game (never taken down)
- • Lopes' 4 career arm triangle choke submissions
- • Limited UFC sample (3 fights Stirling, 2 fights Lopes)
🏁Executive Summary
Navajo Stirling's overwhelming reach advantage, elite striking volume, and City Kickboxing tactical system create a dominant framework against Bruno Lopes in the 30-foot octagon. Stirling's 6.13 SLpM vs Lopes' 2.81 represents a nearly 2.18x volume advantage, while his 79" reach vs 74" creates a 5-inch range differential that systematically controls distance. Stirling's three consecutive UFC decisions demonstrate disciplined execution of the range-fighting approach, while his elite cardio (78 score) ensures output increases in later rounds. Lopes' primary upset pathway runs through his wrestling (2.51 TD15) and arm triangle choke finishing ability (4 career arm triangle wins) — a narrow but real route that requires closing the range gap, securing a takedown against 75% TDDef, and reaching side control.
Prediction: Stirling by Decision most likely (50% probability) through consistent volume striking and range control; Lopes' primary upset lane is Submission (12%) via arm triangle choke if he can secure takedowns and reach side control. The fight hinges on whether Lopes can close the range gap and access his grappling game before Stirling's volume and cardio become decisive factors.